New Squarespace Features You Need to Know About
In July 2022, Squarespace released a new page editing experience called Fluid Engine. An update on the Classic Page Editor, Fluid Engine is a more free-form page editor that allows you to place content anywhere on a page, resize, and overlap content freely.
Note:
This streamlined editor is only available Squarespace 7.1. If you started your Squarespace website prior to January 2020, you have an older version of the platform and the features I talk about in this post will not apply to you. Learn how to find your website version here.
Curious about switching platforms to access these features? Get started with Squarespace tech support.
Squarespace has always been one of the most user-friendly, robust website builders out there, which is why I use it exclusively. However, there were certain things about the platform that consistently sparked questions for many website DIYers, my customers and clients included.
Previous versions of Squarespace sparked these common concerns:
Page layout editor
When it came to positioning content on the page, Squarespace’s on-page editor makes it easy to see exactly what you’re going to get. However, some people found the previous drag & drop editor a bit confusing. Content blocks couldn’t overlap, and everything was organized into columns; if you wanted to add space on the left or right side of an item, you’d have to insert a Spacer Block and adjust the column width from there.
Mobile-view limitations
Squarespace has always made it easy for your website to look great on smartphones as well as desktop computers, but some people found Squarespace’s automatic mobile optimization a bit limiting, especially as technology and design have progressed over the past few years.
Image design limitations
Previously, if you wanted your images to be anything besides square or rectangle, you’d have to create the design using a platform like Canva or Adobe, then upload the custom image to Squarespace. This is what I’ve done for years as a Squarespace designer, but now Squarespace has incorporated many image editing features into the platform, cutting down on the need for outside editing.

Squarespace 7.1 and its newest page editing functionality, Fluid Engine, have addressed these concerns and improved upon these areas. Since Fluid Engine has introduced a pretty drastic shift in how you’ll go about editing your pages, I wanted to create a post for those of you who have a 7.1 site or plan to use Squarespace 7.1 in the future.
Note: If you have an existing 7.1 site, this update will not impact your existing content or design 😎 Stick around until the end of this post to find out how to enable Fluid Engine on existing 7.1 sites.
1. Drag & Drop Editing

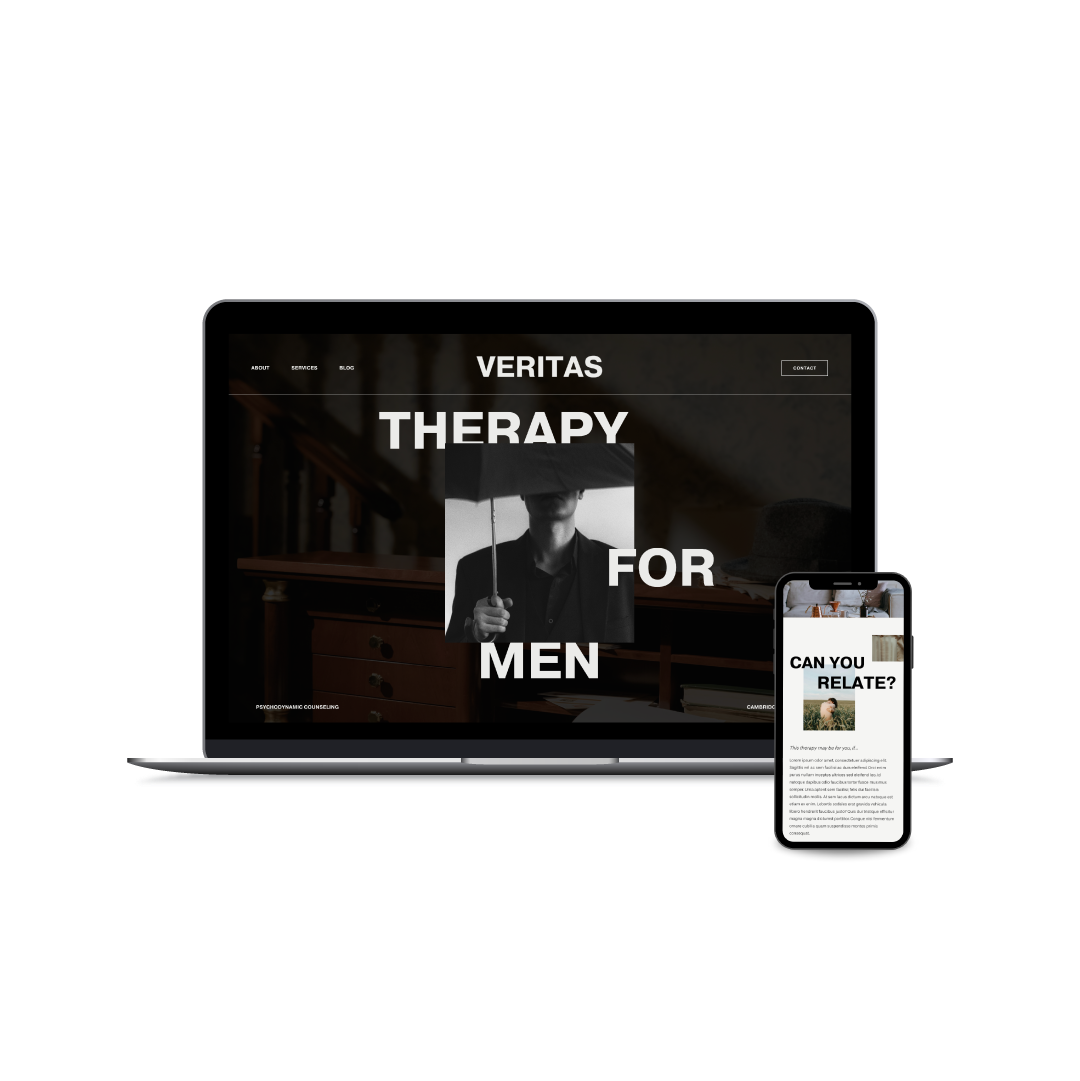
The first, and potentially most obvious shift is the new drag & drop editor. Instead of using columns to organize content on the page, you can now move content around freely on a grid of columns and rows.
Now, the page editor operates very similarly to many other content creation programs, like Canva or Powerpoint. Drag content bounding boxes to adjust size, overlap content blocks, and push content all the way to the edge of your page - all without Spacer Blocks or Custom CSS!
Pro tips:
When editing your page, type the “G” key on your keyboard to make the grid visible.
Use the “undo” command (ctrl + Z) to undo any move.
Don’t add too many blocks to a section. This could end up looking chaotic and overwhelm your visitors.
Make sure the content in any overlapping blocks is still visible and usable. Just because you can overlap, doesn’t mean you should! Not comfortable making these design decisions? Use a template!
2. Adjustable Grid
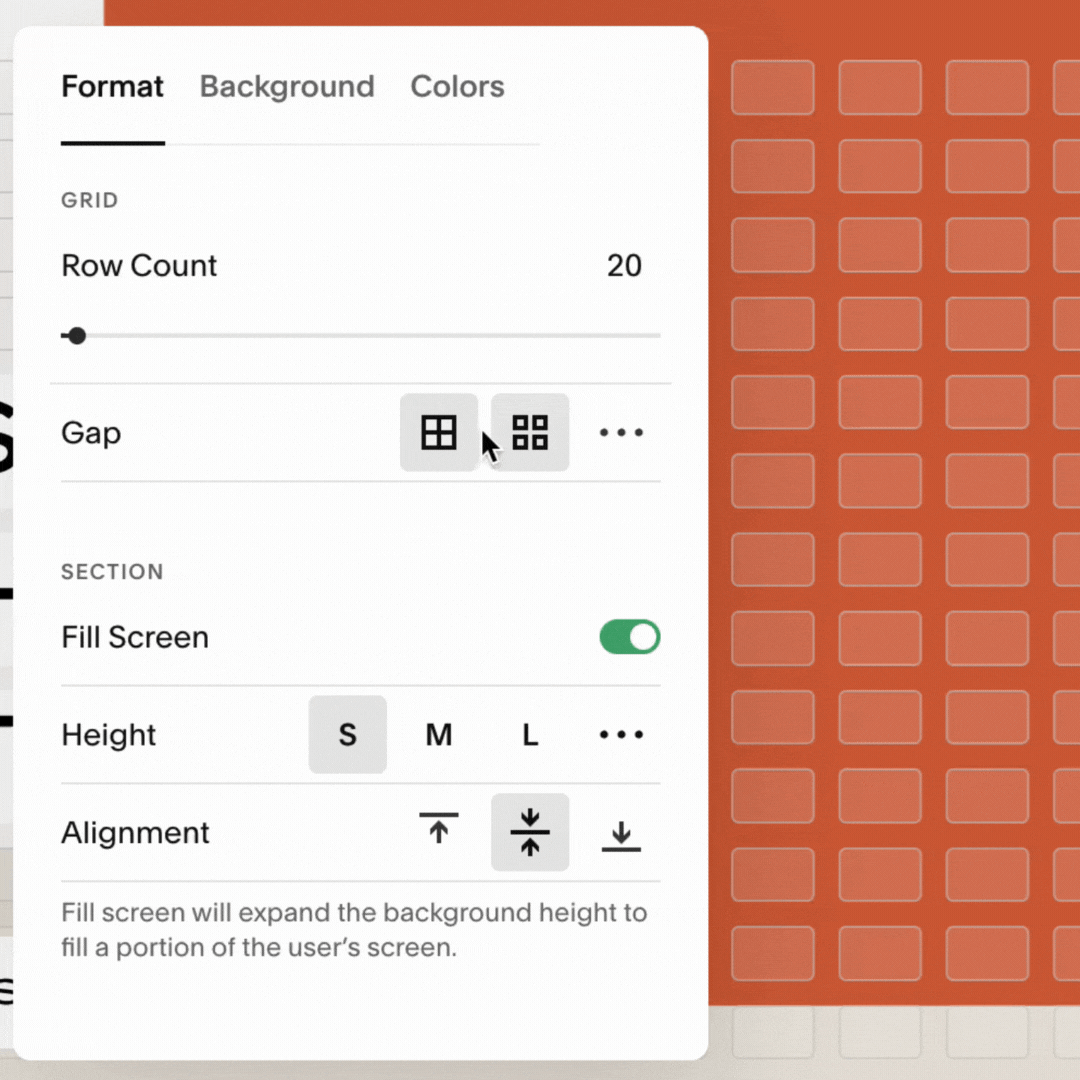
With the new page layout grid comes grid formatting options (thank goodness!). If things aren’t aligning the way you want them to, despite attempts to resize and position accordingly, there’s a good chance a quick grid adjustment will help.
pro tips:
Quickly remove space between columns and rows with the “no gap” button.
Grid adjustments are not site-wide, so you can choose different grid spacing depending on the section. Yay!
Because all content blocks sit on top of the grid, be aware that any adjustments in grid spacing will move any existing content around on the page. You may have to readjust your page content before saving the page.
3. Block Layering

With the ability to overlap blocks, comes a positioning toggle - Yay! (The designer nerd in me is getting way too excited about these things 🤓). Quickly and easily move a block behind another one by choosing either “Move Forward” or “Move Backward.”
Pro tips:
Make sure all areas of text are readable (don’t put Text Blocks behind images).
Again, layering several content blocks is not advisable. When in doubt, keep it simple! Or use a template.
4. Customizable Mobile Layouts
As I mentioned at the beginning of this post, Squarespace used to automatically arrange your mobile site layout. To give creators more freedom, Squarespace unlinked desktop and mobile layouts, and now you can customize your mobile layout on Fluid Engine sections.
With more and more people viewing websites from their phones rather than computers, it’s crucial that your website looks amazing in mobile view. This upgrade to customizable mobile layouts is a big win, from a design standpoint, but I totally understand if the thought of organizing a desktop view only to repeat the process for mobile sounds like a lot of work!
Lucky for you, I’ve done all that work for you with my Squarespace templates for therapists and coaches. All of my templates are mobile-ready; all you have to do is pop in your content and publish!
Pro Tips:
When editing any section or page, always check mobile view before saving. Since desktop and mobile layouts are now separate, mobile layouts will have to be arranged manually.
Changes in mobile layout won’t impact your desktop layout.
Block settings (like text alignment, corner radius, and color changes) will apply to both desktop and mobile view.
5. Text Block Backgrounds

If you’ve used Squarespace for any amount of time, you’ve probably wondered, “Why can’t I add a background color to this text block?” I know I’ve caught myself asking that question several times!
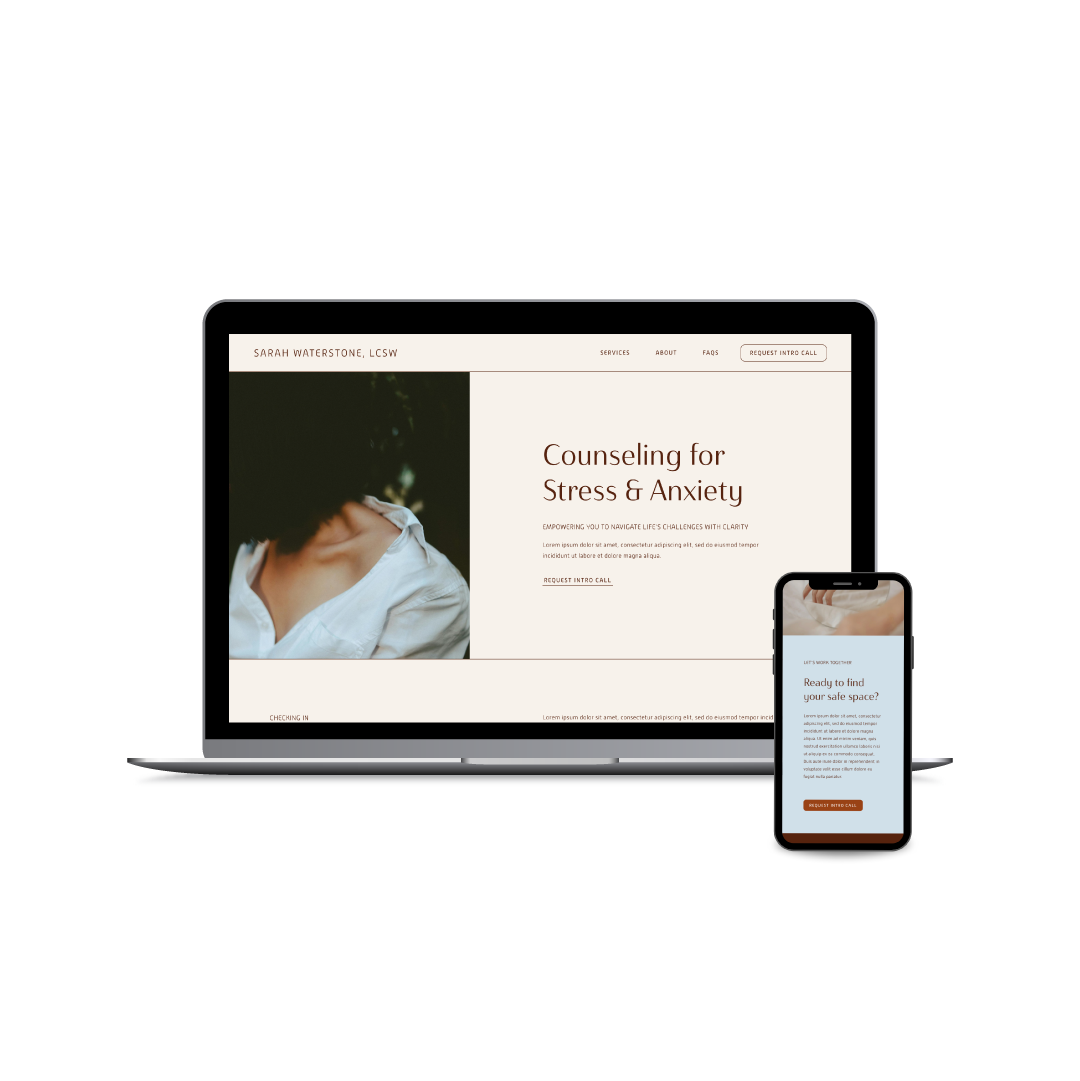
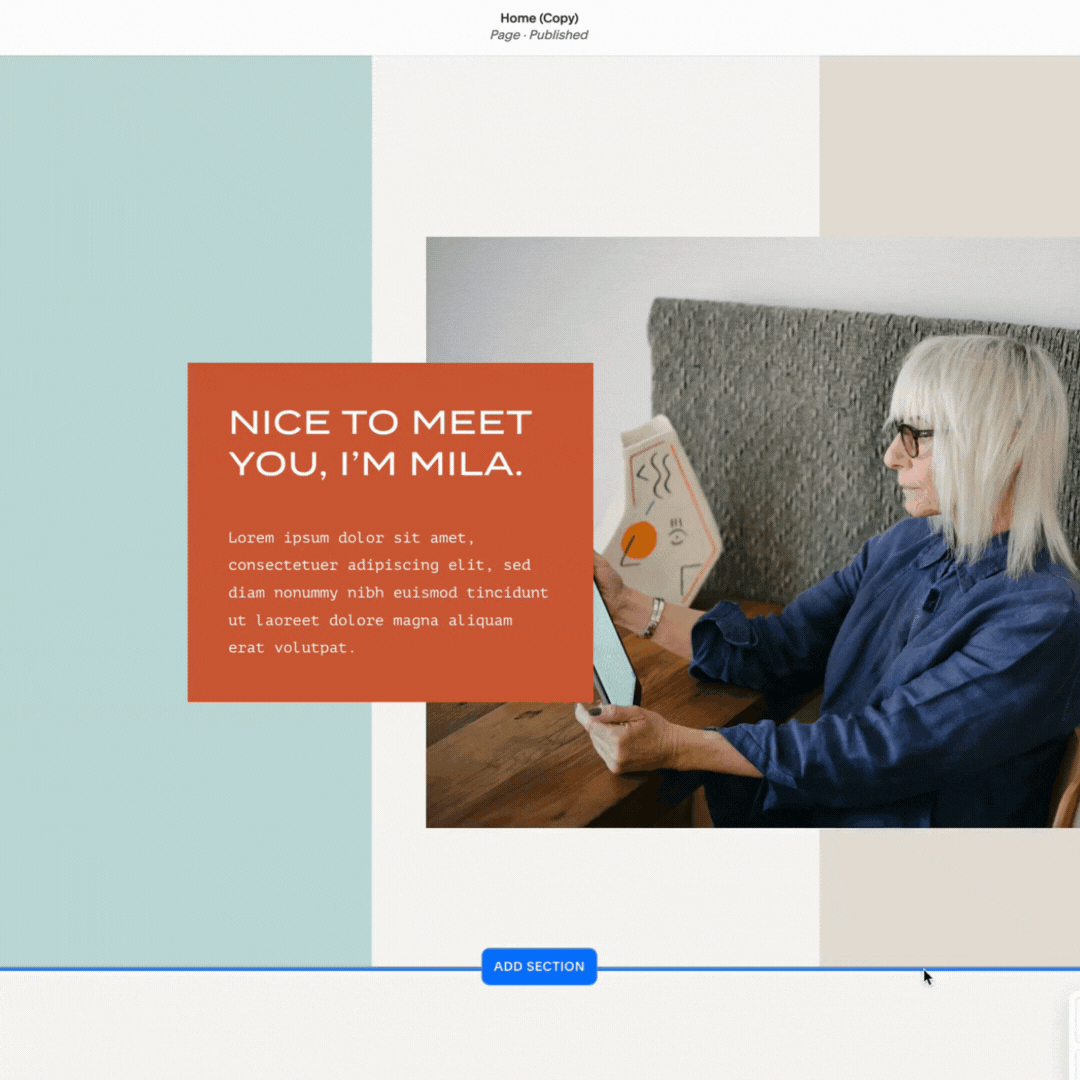
Now we can! Which is great, because if you want to place text on top of an image background, or overlap text, as I’ve done on the Sol template above, legibility is a factor. To make sure your website is accessible and easy to read for everyone, text backgrounds make that as simple as clicking a slider.
Pro Tips:
Consider using a text block background when placing text on top of an image background. This will make your text easier to read, increasing accessibility and SEO.
Use the padding options to add space around your text.
If rounded corners make sense with your branding, adjust the corner radius using the options in the design panel.
6. Adjustable Vertical Text Alignment

Vertical text alignment seems like a small, insignificant feature, but I’ve found it to be incredibly handy as I’ve experimented with Fluid Engine thus far. Especially when adding a background color, it makes more sense (and tends to look better) when the text shows up in the middle of the text box.
Pro tips:
Vertical alignment in desktop view is separate than vertical alignment in mobile view, so be sure to double-check your settings in mobile view before saving edits on a page.
In general, I recommend using the center-aligned option when you add a background color. This will ensure that the text shows up in the middle of the background.
7. Image Block Adjustments
In Fluid Engine, there are a few more design options within Image Blocks than there used to be.
Option 1: Fit
The “Fit” option will ensure that your entire image remains visible, regardless of the size of container. This is a great option for any images with graphic design details that you’ve added outside of Squarespace (such as outlines, text details, brand marks, or textural elements).

Option 2: Fill
The “Fill” option will make it so that the image takes up the entire container, no matter what size or shape. Basically, the image fills the container space, hence the name!

Option 3: Shape
These image shape options were available prior to the release of Fluid Engine, but I thought I’d mention them here too. Squarespace now offers several image frames to easily create shapes without leaving the platform. Optional: enable the “stretch” slider to stretch your image to fit the shape.

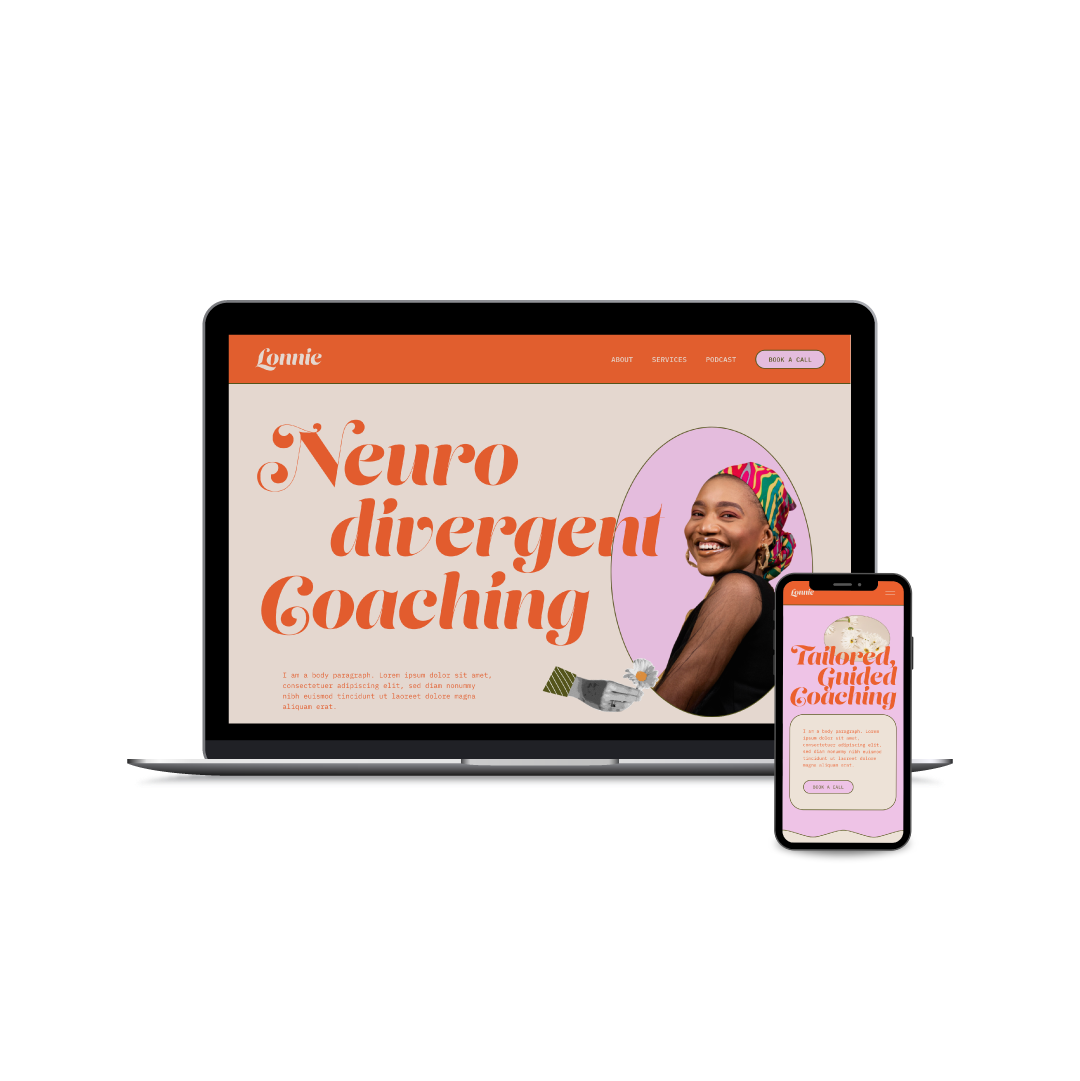
8. Customizable Image & Text
I’ve already mentioned the newest image and text features shown here, but I wanted to mention that with these updates, Squarespace has done away with built-in layout options (for seasoned Squarespace users, I’m talking about Collage Blocks, Card Blocks, etc.).
With Fluid Engine you can recreate these classic block types by inserting an Image Block, then a Text Block, as I’ve done above.
However, this also means we can get even more creative than what the previous built-in layouts allowed, which is a win in my book!
Pro tips:
When overlapping text on an image, make sure the text is still visible and readable.
Don’t forget to check mobile view before saving!
What if I have a 7.1 site, but I don’t see Fluid Engine features?
If you have a Squarespace 7.1 site, but you’re not seeing the grid when you edit your pages, or you can’t access some of the features I mentioned here, there are some steps you can take to turn Fluid Engine on.
Step 1: Determine if Fluid Engine is available on your website.
Open your website in Squarespace and click “Edit” on any page. If you see an “Upgrade” button in the upper left corner of your page sections, that means Fluid Engine is available on your website. I don’t recommend clicking “Upgrade” right away, though! See step 2.

If you don’t see a button that says “Upgrade” when your page editor is opened, Fluid Engine may not be enabled on your site yet. If this is the case for you, open a chat with Squarespace customer support and they can get it turned on for you.
Step 2: Duplicate a page to start experimenting
Once you’ve determined that Fluid Engine is available on your website, I recommend experimenting a little bit before going all-in.
To get started, duplicate one of your existing pages.
Make sure this page is in the “Not Linked” section of your pages panel, and disable the page to hide it (Page Settings > General > Enable slider: off).
Then, on this duplicate page, click “Upgrade” on one of your page sections and start experimenting! Move content around a little bit, add blocks, try out the features I listed here.
This will help you determine whether or not you’d like to upgrade any of your existing sections to Fluid Engine.
Step 3: Upgrade existing sections to Fluid Engine as needed
Keep in mind that once you upgrade a Classic Editor section to Fluid Engine, you can’t switch it back. This is why I recommend experimenting a bit first, as I described in step 2.
However, if you decide you’d like to upgrade a particular section, here’s what I recommend:
Click “Edit” on your page.
Duplicate the section you’d like to upgrade.
Upgrade the duplicated section.
Fix anything that may have moved/shifted during the upgrade process.
When you’re satisfied with the new upgraded section, delete the old Classic Editor section.
Click “Save” on the page.
You don’t have to upgrade all of your sections to Fluid Engine if you don’t want to. You don’t have to upgrade any! But the option is there if you want it.